Android SDK Platform-Tools: The Complete 2026 Guide to ADB and Fastboot
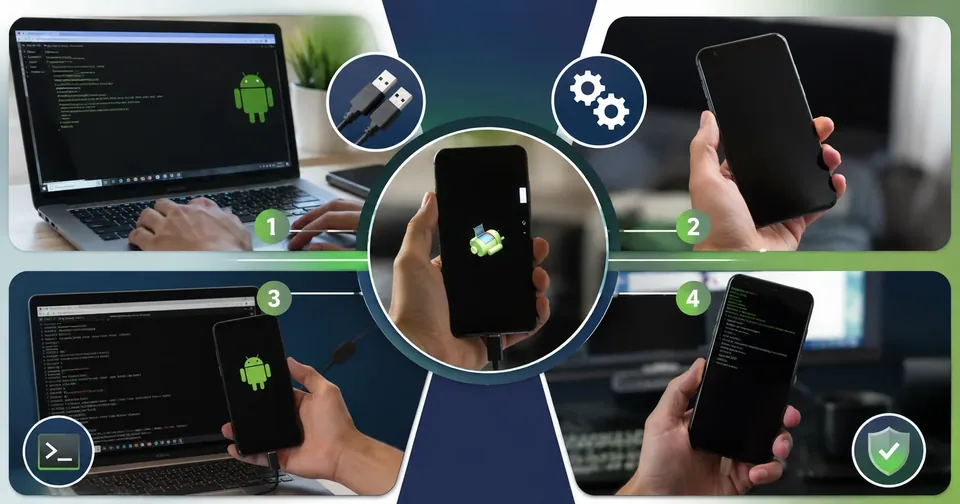
If you have ever wanted to install an app that is not on the Play Store, pull logs from your phone, or flash a custom build, you have probably run into a package called Android SDK Platform-Tools. It is the small but powerful toolkit that lets your computer talk directly to an Android device.
The good news is that you do not need to be a full-time developer to use it, and you do not need the giant Android Studio download either. This guide explains what the package is, what is inside it, how to install it on Windows, Mac, and Linux, and the exact commands that get real work done.
We will also cover safe use, the most common errors, and how to keep everything up to date. Let's dig in.
What Is Android SDK Platform-Tools?
Android SDK Platform-Tools is a component of the Android Software Development Kit, better known as the Android SDK. Its job is simple. It holds the command-line tools that let a computer communicate with an Android phone, tablet, watch, TV, or emulator. The two stars of the package are adb and fastboot.
It is tiny. The whole download is only around 10 MB, compared to more than a gigabyte for the full Android Studio. You can grab it on its own, without installing anything else, which is why so many power users keep a copy handy.
Google updates the package often to support new Android versions, and every release is backward compatible. That means you only ever need the newest version, because it still works with older phones. At the time of writing, the current release is version 37.0.1, published in July 2026.
One older tool, systrace, used to ship inside the package. Google has since retired it in favor of newer options like Perfetto and the profiler built into Android Studio. So today, the package is really about those two command-line tools.
A quick note on version numbers. Releases follow a simple pattern, like 36.0.0 and then 37.0.1, and each one arrives alongside new Android releases such as Android 16 and 17. Because they are backward compatible, you can safely grab the newest build even for an older phone. The download links never show a number, so if you need to know exactly what you have, check it with a command right after installing.
What's Inside the Package
Here is what you actually get when you unzip the download:
Tool | What it does |
|---|---|
adb | Android Debug Bridge. Sends commands from your computer to a connected device. It installs apps, copies files, reads logs, and opens a shell on the phone. |
fastboot | Talks to the device's bootloader. It is used to unlock the bootloader and flash system images, such as a recovery or a full ROM. |
Helper files | A few supporting binaries and libraries that adb and fastboot rely on. You never call these yourself. |
You will not touch the helper files directly. They simply sit in the folder so the two main tools can run.
adb vs fastboot: What's the Difference?
Both come in the same package, but they work at different moments and carry very different risk. This quick comparison sorts them out:
Aspect | adb | fastboot |
|---|---|---|
When you use it | While Android is running | While the phone is in bootloader mode |
Main purpose | Debugging, installing apps, copying files | Unlocking the bootloader and flashing images |
Risk level | Low, safe for everyday use | High, can wipe or brick the device |
Typical users | Developers and power users | Modders and advanced users |
What You Can Do With Platform-Tools
Once it is set up, this little toolkit unlocks a lot. These are the jobs people reach for it most often:
Install or sideload apps (APK files) that are not on the Play Store
Debug apps by reading live crash logs with logcat
Copy files back and forth between your computer and your phone
Take screenshots and record the screen from the command line
Remove preinstalled bloatware without rooting the device
Back up and restore app data
Unlock the bootloader and flash a custom recovery or ROM with fastboot
Set up wireless debugging so you can work without a cable
Sideloading is popular for testing your own builds or installing niche apps that never reached the store. Here is a quick real-world example: an app update breaks something and you want the older version back. With one command you can uninstall the update and reinstall the APK you saved earlier, with no factory reset needed. Another common one is bloatware. Phones often ship with apps you cannot remove through the normal menu, and a single command can disable them without rooting the device.
If you build or test software, keeping a set of browser-based Developer Tools nearby pairs nicely with the command-line work you will do here.
Who Actually Uses Platform-Tools?
This toolkit is not just for app developers. A wide mix of people keep it installed:
App developers, to test builds on real devices and read crash logs
QA and test engineers, to automate installs and pull results off a device
Power users, to strip out bloatware and sideload apps
Android TV and Wear OS owners, to load apps that are not offered for those screens
IT and support staff, to push settings or apps across a fleet of company devices
In short, if you want more control over an Android device than the normal settings menus allow, this is the standard way to get it.
Platform-Tools vs the Rest of the Android SDK
People often mix up Platform-Tools with the full SDK or with Android Studio. They are related but not the same. Here is how the main pieces fit together:
Component | What it does | Needed for adb and fastboot? |
|---|---|---|
Platform-Tools | Contains adb and fastboot to talk to a device. | Yes. This is the one. |
Build-Tools | Compiles and packages apps (aapt2, d8, zipalign, apksigner). | No. |
Command-line Tools | Manages the SDK itself (sdkmanager, avdmanager). | No, but sdkmanager can install it. |
SDK Platform | The Android API libraries for each version (android.jar). | No. |
Android Studio | The full IDE, emulator, and SDK Manager in one app. | Optional. It bundles a copy for you. |
The takeaway is simple. If all you want is adb and fastboot, the standalone download is all you need. If you also plan to build apps, run the emulator, or juggle many SDK versions, Android Studio bundles everything and keeps its copy of the tools updated for you. For more plain-English breakdowns of tools like this, the Software section is worth a browse.
How to Download Android SDK Platform-Tools
There are two clean ways to get the package, and both come straight from Google. That matters for safety. You should only download it from the official Android developer website, never from random mirrors that could bundle malware.
The first way is the standalone ZIP. Google offers one file for each operating system:
Your computer | File you download |
|---|---|
Windows | platform-tools-latest-windows.zip |
macOS | platform-tools-latest-darwin.zip |
Linux | platform-tools-latest-linux.zip |
These are rolling links, so they always point to the newest release. You never have to hunt for a version number.
The second way is through Android Studio. Open its SDK Manager, or use the sdkmanager command-line tool, and install or update Android SDK Platform-Tools from there. This route is best if you already use Studio, because it saves the tools in the right place and updates them automatically.
Whichever route you choose, it is worth confirming the version once the download finishes. Run adb version in a terminal, and you will see the exact build you have. Since the download links do not show a number, this is the only reliable way to know whether you are on the latest release before you start scripting against it.
System Requirements and Drivers
The requirements are light. Any modern Windows, macOS, or Linux computer can run the tools, and the download itself is only about 10 MB, so it fits almost anywhere.
Windows users have one extra thing to know. The tools rely on the Microsoft Universal C Runtime, which most systems already have through Windows Update. If you ever see an error about a missing DLL, install that runtime. Windows also often needs a USB driver from your phone's maker so the computer recognizes the device in the first place.
macOS and Linux usually need no drivers at all. Your phone is recognized as soon as you set it to File transfer mode and approve the connection.
How to Install and Set Up on Windows
The word install is a bit of a stretch, because there is no installer. You unzip the file and tell your system where to find it.
Step 1 - Extract the ZIP
Right-click the downloaded file and choose Extract All. You will get a folder named platform-tools. Move it somewhere permanent, like the root of your C drive, so you do not lose track of it later.
Step 2 - Add the Folder to Your PATH
Open the Start menu, search for Environment Variables, and open Edit the system environment variables.
Click the Environment Variables button.
Under System variables, select Path and click Edit.
Click New and paste the full path to your platform-tools folder.
Click OK on every window to save your changes.
Adding it to your PATH lets you run the tools from any folder. If you skip this step, the tools still work, but only from inside the platform-tools folder itself.
Step 3 - Test It
Open a new Command Prompt and type adb version. If you see a version number, you are all set. If Windows says the command is not recognized, your PATH entry needs another look.
How to Install on macOS
Mac users get two easy options: do it by hand, or let Homebrew handle it.
The Manual Way
Double-click the downloaded ZIP to unpack it. You will get a platform-tools folder.
Move that folder to your home directory or another safe spot.
Open Terminal and add the folder to your PATH by editing your shell profile.
For the last step, add this line to your ~/.zshrc file: export PATH="$PATH:$HOME/platform-tools". Save it, then run source ~/.zshrc or just open a new Terminal window.
The Homebrew Way
If you use Homebrew, one line does everything: brew install --cask android-platform-tools. Homebrew downloads, unpacks, and adds the tools to your PATH for you, and updating later is just as painless.
Either way, confirm it works by running adb version in Terminal.
How to Install on Linux
Linux gives you the same two choices, manual or package manager.
The Manual Way
Extract the archive with unzip platform-tools-latest-linux.zip.
Move the resulting folder somewhere sensible, such as your home directory.
Add it to your PATH, then reload your shell profile.
To add it, put export PATH="$PATH:$HOME/platform-tools" in your ~/.bashrc (or ~/.zshrc), then run source ~/.bashrc.
The Package Manager Way
Many distributions ship the tools in their repositories. On Debian or Ubuntu, sudo apt install android-tools-adb android-tools-fastboot gets you going fast. The catch is that repository versions can lag behind Google's latest, so for brand-new phones the official ZIP is the safer pick.
How to Connect Your Android Device
Before any command works, your phone has to trust your computer. That takes two quick settings and one prompt.
Turn On Developer Options and USB Debugging
Open Settings, then tap About phone.
Tap Build number seven times, until it says you are now a developer.
Go back and open Developer options, usually under System.
Turn on USB debugging.
Connect Over USB
Plug your phone into the computer with a data cable, not a charge-only one.
On the phone, set the USB mode to File transfer.
Run adb devices on the computer.
Tap Allow on the phone when the authorization prompt appears.
Once you tap Allow, your device shows up in the list and you are ready to run commands. Check Always allow from this computer so you skip the prompt next time.
Connect Wirelessly (Android 11 and Newer)
You can also skip the cable. In Developer options, open Wireless debugging and tap Pair device with pairing code.
Run adb pair with the pairing address and code shown on the phone.
Then run adb connect with the connection address, which is different from the pairing one.
One detail trips people up here: the pairing port and the connect port are not the same. The connect port appears on the main Wireless debugging screen, not on the pairing pop-up.
How ADB Works Under the Hood
It helps to know what happens when you type an adb command, because it explains a lot of the errors you might run into. adb has three parts working together:
A client on your computer, which is what launches when you type an adb command
A server, also on your computer, that manages communication in the background and listens on port 5037
A daemon, called adbd, that runs on the Android device and actually carries out your commands
When you run your first command, the client quietly starts the server if it is not already running. The server then finds every connected device, over USB or Wi-Fi, and routes your command to the right one.
This is why adb kill-server and adb start-server fix so many problems. Restarting the server clears stale connections. It is also why the first command after plugging in a phone can feel a beat slow, since the server is spinning up and scanning for devices.
Essential ADB Commands
adb is where you will spend most of your time. These are the commands worth memorizing:
Command | What it does |
|---|---|
adb devices | Lists every device and emulator currently connected. |
adb version | Shows the installed version so you can confirm it works. |
adb install app.apk | Installs an APK file onto the device. |
adb uninstall <package> | Removes an installed app by its package name. |
adb push <local> <remote> | Copies a file from your computer to the device. |
adb pull <remote> <local> | Copies a file from the device to your computer. |
adb logcat | Streams the device's live system log, useful for debugging. |
adb shell | Opens a command shell directly on the device. |
adb reboot | Restarts the device. Add bootloader or recovery to boot into those modes. |
adb pair <ip>:<port> | Pairs for wireless debugging on Android 11 and newer. |
adb connect <ip>:<port> | Connects to a paired device over Wi-Fi. |
adb kill-server | Stops the adb background service, handy when things act up. |
A quick real-world combo: run adb devices to confirm the phone is connected, then adb install app.apk to sideload an app in seconds.
Handy ADB Recipes for Everyday Use
Beyond the basics, a few longer commands come in handy again and again. Here are some favorites worth keeping around:
Task | Command |
|---|---|
Take a screenshot | adb exec-out screencap -p > screen.png |
Record the screen | adb shell screenrecord /sdcard/video.mp4 |
List installed apps | adb shell pm list packages |
Clear an app's data | adb shell pm clear <package> |
Disable a preinstalled app | adb shell pm disable-user <package> |
Reboot into recovery | adb reboot recovery |
Target one connected device | adb -s <serial> install app.apk |
When more than one device is connected, add -s followed by the serial number from adb devices so the command hits the right phone. Save the ones you use most in a text file for quick copy and paste.
How to Sideload an App Step by Step
Sideloading is one of the most popular reasons people install the package, so here is the full flow from start to finish:
Download the APK file to your computer and note where it saved.
Connect the phone with USB debugging on, then confirm it with adb devices.
Run adb install followed by the path to the APK file.
Wait for the word Success to appear in the terminal.
Open the new app from your phone's app drawer.
For step three, the command looks like adb install C:\apps\myapp.apk. If you get an error about an existing package, add the -r flag to reinstall, or remove the old version first. Only install APKs from sources you trust, since sideloading skips the Play Store's safety checks.
Understanding Fastboot and Bootloader Mode
fastboot only works when your phone is in a special low-level state called bootloader or fastboot mode. This is a tiny environment that runs before Android itself loads, which is exactly why it can rewrite the system.
You can enter it two ways. From a running phone, run adb reboot bootloader. Or, with the phone off, hold a button combination, usually power plus volume down, though it varies by brand.
Two more terms matter here. A locked bootloader is the default and blocks flashing for security. An unlocked bootloader allows flashing but lowers the phone's protection and wipes your data during the unlock. Most people never need to unlock unless they are installing a custom ROM or recovery. Once you are in fastboot mode, always run fastboot devices to confirm the computer sees the phone before you flash anything.
Essential Fastboot Commands
fastboot is the more advanced tool, and it deserves respect. It talks to your bootloader, and some of its commands wipe your device or can leave it unbootable if used carelessly. Read twice, run once.
Command | What it does |
|---|---|
fastboot devices | Lists devices currently in fastboot (bootloader) mode. |
fastboot reboot | Restarts the device out of fastboot mode. |
fastboot getvar all | Prints device info, including the bootloader lock state. |
fastboot flashing unlock | Starts the bootloader unlock process. This erases the device. |
fastboot flash <part> <img> | Writes an image file to a partition, such as recovery. |
fastboot flashall | Flashes a full factory image set at once. |
Unlocking a bootloader almost always erases everything on the phone as a security measure, and it can affect your warranty and some banking or payment apps that check whether the device is locked. Only go down this road if you understand the trade-offs and have a full backup. If a flash goes wrong, the phone may fail to boot, so make sure you have the correct image file for your exact model before you run anything. When it comes to fastboot, patience beats speed every time.
How to Keep Android SDK Platform-Tools Updated
Because Google releases updates often and they are backward compatible, running the latest version is the smart move. It adds support for new phones and fixes bugs, with almost no downside.
If you installed the standalone ZIP, updating means downloading the newest ZIP and replacing your old platform-tools folder. If you use Android Studio or Homebrew, updates come through the SDK Manager or a quick brew upgrade. Either way, it takes under a minute.
New Android versions can change how a few commands behave, so it helps to follow the latest Tech News if you tinker often.
How to Remove Platform-Tools
Getting rid of the tools is as simple as installing them. Because there was no installer, there is nothing to run in reverse.
If you used the ZIP, delete the platform-tools folder, then remove its entry from your PATH.
If you installed with Homebrew, run brew uninstall --cask android-platform-tools.
If it came with Android Studio, open the SDK Manager and untick the Platform-Tools item.
That is all it takes. There are no leftover registry keys or hidden services to chase down, which is part of what makes this package so clean to work with.
Common Problems and How to Fix Them
Most hiccups come down to a handful of causes. This table maps the usual errors to quick fixes:
Problem | Likely cause | How to fix it |
|---|---|---|
"adb is not recognized" | The folder is not on your PATH. | Add the platform-tools folder to PATH, or open the terminal inside that folder. |
Device shows as unauthorized | You have not approved the computer on the phone. | Reconnect and tap Allow on the prompt. Confirm USB debugging is on. |
No devices found | Wrong USB mode, a charge-only cable, or missing drivers. | Set USB mode to File transfer, swap the cable, and install the OEM driver on Windows. |
Device is offline | A stale connection or an old build. | Run adb kill-server, then adb devices, and update to the latest version. |
fastboot devices is empty | Missing bootloader drivers on Windows. | Install the device's fastboot driver, then try a different USB port. |
When in doubt, the classic reset is to run adb kill-server, unplug and replug the phone, and try again. It clears a surprising number of odd states.
Safety and Best Practices
A few habits keep you out of trouble:
Download only from Google's official Android developer site, never third-party mirrors.
Back up your phone before running any fastboot flashing command.
Do not blindly paste commands from forums. Understand what each one does first.
Remember that unlocking the bootloader wipes data and may affect warranty and secure apps.
Turn off USB debugging when you are done, especially on a shared or public computer.
These are not just nice-to-haves. They protect your data and your device. Command-line access is powerful, and that power cuts both ways. A calm, careful approach keeps the tools firmly on the helpful side, and it takes only a few extra seconds to read a command before you press Enter.
Quick Tips and Key Takeaways
The package is free, tiny, and official. It is really just adb and fastboot in a small ZIP.
You do not need Android Studio to use it.
Add the folder to your PATH so commands run from anywhere.
Enable USB debugging and approve the prompt before running commands.
Always keep the latest version, since it stays backward compatible.
Treat fastboot with care, because it can erase your device.
Android SDK Platform-Tools packs a lot of capability into a 10 MB download. Whether you are sideloading an app, chasing a bug, or flashing a fresh build, adb and fastboot are the tools that get it done, with no bloated IDE required. Set it up once, add it to your PATH, and it is ready whenever you need it. For more step-by-step guides and free utilities, browse the Toolsimpli Blog or explore the tools over at Toolsimpli.
Frequently Asked Questions
Is the package free to download? Yes. It comes straight from Google at no cost. You only need to accept the standard SDK license before the download starts.
Do I need Android Studio to use adb and fastboot? No. The standalone download works on its own. Studio simply bundles a copy and keeps it updated if you prefer that route.
Do I have to install it in a special place? No. Unzip it anywhere you like and run the tools from that folder, or add the folder to your PATH so they work everywhere.
Does unlocking the bootloader erase my phone? Usually yes. Unlocking wipes your data for security reasons, so back up everything first.
How do I update to the newest version? Download the latest ZIP and replace your old folder, or update through the SDK Manager or Homebrew.
Related posts
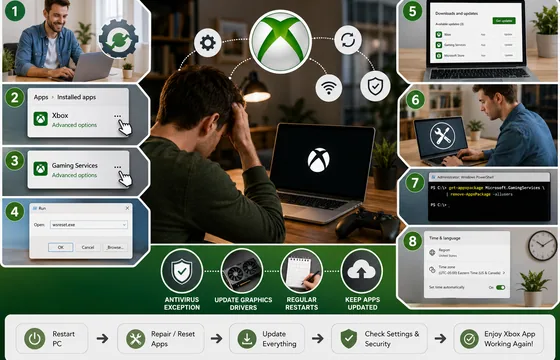
Xbox App Not Working on PC in 2026: 9 Fixes That Actually Work
The good news is that this problem almost always comes down to a small handful of causes: a corrupted background service, an outdated app version, a broken sign-in token, or a Windows update that didn't finish cleanly. None of these require reinstalling Windows. Below is a complete, step-by-step guide to get the Xbox app running again.
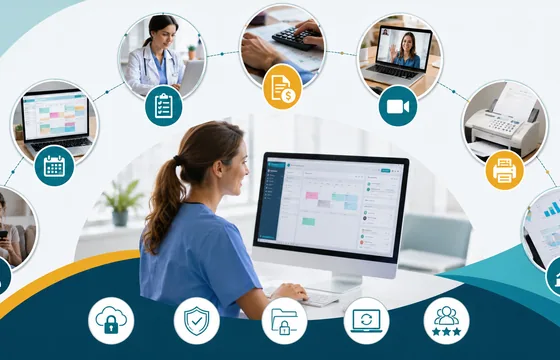
Procentive App Review 2026: Features, Pricing, Pros, Cons and Alternatives
The core purpose of Procentive in 2026 is simple: help behavioral health organizations spend less time on admin work and more time with clients. It does this by connecting clinical documentation, scheduling, and billing into a single workflow, so information entered once flows automatically to the next step, whether that's a progress note or an insurance claim.
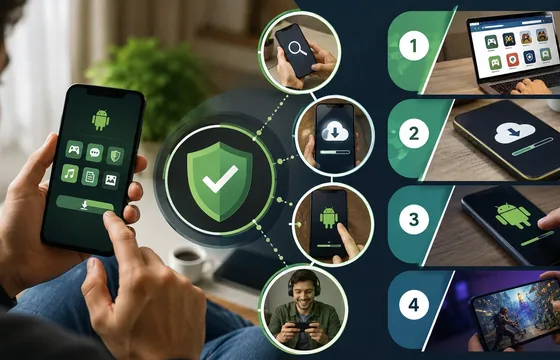
Best Legitimate APK Sites 2026: Verified & Trusted App Download Platforms
Remember: When choosing between apk sites, prioritize transparency, reputation, and your specific needs. The best apk sites in 2026 are those that respect your privacy, verify their content, and operate with genuine user interests in mind. Your digital freedom is worth protecting. Choose wisely. Choose legitimacy. Choose from our verified best apk sites list.