How to Resize Images to Any Dimension: Complete Guide to Image Converters
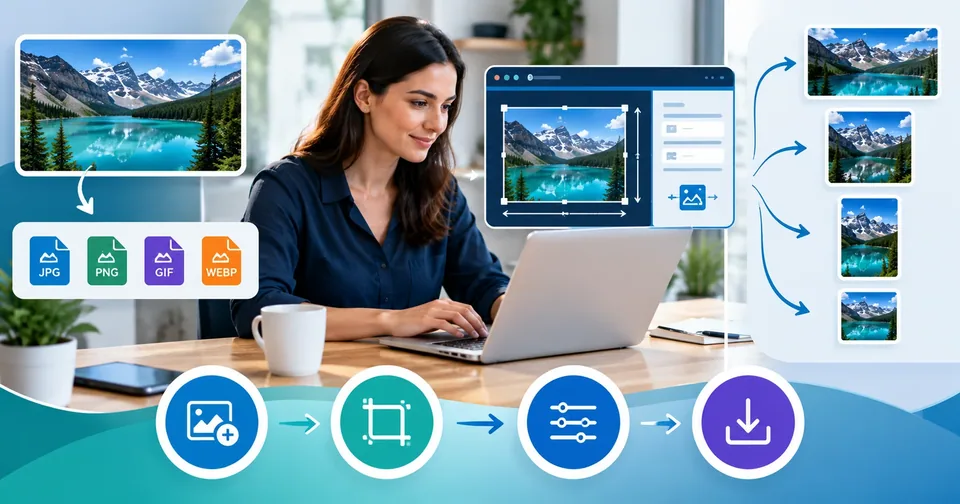
Images are everywhere online, but they rarely come in the exact size you need. Whether you're preparing photos for social media, creating graphics for your website, or preparing files for print, knowing how to resize images to specific dimensions is essential. From making an image 1920x1080 for video thumbnails to converting a picture to a 3000x3000 format for high-quality prints, the right tools and techniques make all the difference.
This guide walks you through everything you need to know about image resizing, including when to use specific dimensions and how to use professional resizers efficiently.
Why Different Image Dimensions Matter
Different platforms and purposes require different image sizes. A dimension that works perfectly for Instagram might be completely wrong for a website header or a printed brochure. Understanding what dimensions work best for your specific needs prevents wasted time and poor-quality results.
Each use case—from social media to web design to professional printing—has optimal image dimensions. Using the wrong size can result in stretched, blurry, or pixelated images that look unprofessional. The good news is that modern image resizers make it simple to convert pictures to virtually any dimension you need.
Common Image Dimensions and Real-World Uses
1920x1080 for Web and Video
The 1920x1080 resolution is the standard for full HD video and wide-screen displays. When you need to make image 1920x1080 resolution, you're typically creating content for YouTube, video presentations, or website hero sections. This dimension offers excellent clarity on modern screens and is widely supported across platforms. An image resizer 1920x1080 capable tool is invaluable for anyone creating video content or managing high-end web properties. Converting a picture to 1920x1080 ensures your visuals display correctly on most modern monitors without distortion.
1000x1000 for Social Media
A 1000x1000 picture works perfectly for social media platforms like Instagram, Facebook, and Pinterest. This square format is visually appealing and displays consistently across devices. When you need a 1000x1000 image converter, you're preparing content for maximum engagement on social platforms. Resizing images to 1000x1000 ensures they appear crisp on mobile devices while maintaining professional quality.
3000x3000 for Print and Large Formats
For high-quality printing, a 3000x3000 image converter becomes essential. The 3000x3000 pixels in size format provides sufficient resolution for large poster prints, canvas artwork, or professional marketing materials. If you need to resize image 3000x3000 dimensions, you're creating professional-grade assets designed to be printed at substantial sizes without quality loss. A 3000x3000 image resizer handles this dimension with precision, allowing you to scale images up while maintaining quality. The 3000x3000 pixels converter is particularly popular among graphic designers, photographers, and marketing teams who need to create large, high-resolution assets.
512x512 and Other Square Formats
Smaller square formats like 512x512 work well for app icons, profile pictures, and thumbnails. A 500x500 converter helps create uniform profile images for social platforms or membership directories. If you need to resize image to 512x512, you're often preparing assets for web applications or digital services. Using a 500x500 converter ensures consistency across your digital properties.
1500x1000 and Custom Dimensions
Not all projects fit standard dimensions. Sometimes you need a 1500x1000 pixels in size format for specific design requirements. A flexible image resizer handles custom dimensions like 1500x1000 effortlessly, making it possible to adapt any image to your exact specifications.
How to Use an Image Resizer Tool
Modern image resizers have become remarkably user-friendly, whether you're resizing a single image or batches of files. Here's what to expect from a professional image resizing tool:
Step 1: Upload Your Image
Start by uploading the image you want to resize. Most modern tools support common formats like JPG, PNG, WebP, and GIF. The tool typically shows you the current dimensions of your image.
Step 2: Select Your Target Dimensions
Enter the dimensions you need. Many tools offer preset options for popular sizes—like 1920x1080, 1000x1000, or 3000x3000—but also allow custom dimensions. You can usually choose whether to maintain aspect ratio or stretch the image to exact dimensions.
Step 3: Choose Resize Method
Advanced tools let you select between scaling, cropping, or padding the image. If you're resizing an image to 1920x1080 from a different aspect ratio, you might want to add bars or crop to fit perfectly.
Step 4: Download Your Resized Image
Once you've configured your settings, the tool processes your image and provides a download. Most tools allow you to choose the output format and quality settings to balance file size with image quality.
Batch Processing: Resizing Multiple Images at Once
If you need to convert multiple images to the same dimensions, batch processing saves significant time. Professional tools now support bulk operations, allowing you to resize hundreds of images in minutes. You can upload a folder, set your target dimensions, and let the tool handle the rest. This is especially valuable if you need to make image 1920x1080 for an entire video series or resize image 3000x3000 for a product catalog.
Bulk resizing handles various input formats and automatically applies consistent quality settings across all images. Whether you're preparing product photos for an e-commerce site or creating thumbnails for a media library, batch processing eliminates repetitive manual work.
Best Practices for Image Resizing
Maintain Quality When Downscaling
When reducing image size, use high-quality algorithms to minimize quality loss. Avoid resizing images multiple times sequentially—each resize operation can degrade quality. Instead, resize once from your original file to your final dimensions.
Upscaling Considerations
Enlarging an image—like when you need to resize image to 3000x3000 from a smaller original—requires special attention. Use tools with advanced upscaling technology that intelligently adds pixels while maintaining clarity. Small images scaled significantly will always show some quality loss, so it's better to start with the largest source image available.
Aspect Ratio Decisions
Decide how to handle aspect ratio mismatches. If you're converting a picture to 1920x1080 from a different ratio, your options include adding letterboxing, cropping to fit, or stretching the image. Stretching usually looks worst, while intelligent cropping or padding often produces better results.
File Format Selection
Choose the right output format. JPG works well for photographs, PNG for images requiring transparency, and WebP for web optimization. Your resizer tool should support multiple formats to match your specific needs.
Common Image Conversion Scenarios
Creating Video Thumbnails
Video platforms need specific dimensions. YouTube recommends 1280x720 or 1920x1080 thumbnails. Using an image resizer to make image 1920x1080 ensures your thumbnails display correctly and grab viewers' attention.
Preparing Product Photography
E-commerce sites often need standardized product images. You might resize image 1000x1000 for square thumbnails and additionally prepare 3000x3000 versions for detailed views. A bulk resizer handles both requirements efficiently.
Creating Social Media Graphics
Different social platforms require different dimensions. Instagram prefers 1080x1080 for posts, Facebook likes 1200x628 for share images, and Pinterest works best at 1000x1500. Professional tools let you convert picture to 1920x1080 for video content or create a 1000x1000 image converter batch for multiple platforms simultaneously.
Preparing Print Materials
High-resolution prints require substantial image sizes. A 3000x3000 image resizer ensures your artwork prints without quality loss. Professional printing often requires 300 DPI, making proper resolution essential.
Choosing the Right Image Resizing Solution
Several types of solutions exist for image resizing, each with different strengths. Online web tools offer convenience with no software installation required. Desktop applications provide more control and batch processing capabilities. Professional design software like Photoshop or GIMP offers extensive editing alongside resizing. For high-volume work, specialized bulk image resizers are often the most efficient choice.
When selecting a tool, consider your specific needs. Do you need to resize a single image to 512x512 occasionally, or do you process hundreds of photos monthly? Are you working with standard dimensions like 1920x1080 and 1000x1000, or do you frequently need custom sizes? The best solution adapts to your workflow rather than forcing you into rigid processes.
Frequently Asked Questions About Image Resizing
Q1: What's the best way to resize image 3000x3000 without losing quality?
Start with the largest available source image. When enlarging to 3000x3000 pixels converter quality matters most, use professional tools with advanced upscaling algorithms. Avoid multiple resize operations on the same image. If possible, shoot at higher resolution initially rather than trying to enlarge small images later.
Q2: Can I convert a picture to 1920x1080 without stretching if the original has a different aspect ratio?
Yes, most resizers offer solutions. You can add borders (letterboxing) to maintain aspect ratio while fitting the 1920x1080 frame, or strategically crop the image to the correct ratio before resizing. Some tools offer intelligent cropping that identifies and preserves important image content.
Q3: Is a 1000x1000 image converter suitable for print materials?
For small prints like social media content or web use, a 1000x1000 image works fine. For larger prints, you need higher resolution. Professional printing typically requires at least 3000x3000 pixels in size or larger formats depending on the final print dimensions.
Q4: How do I resize image to 512x512 for multiple different aspect ratios?
A 500x500 converter should allow you to specify how to handle aspect ratio mismatches. Most tools offer padding (adding colored borders) or cropping options. For app icons or profile pictures where consistency matters, padding ensures all images maintain their content while fitting exact dimensions.
Q5: What's the ideal workflow for resizing hundreds of images to different dimensions?
Use a bulk image resizer designed for batch operations. Organize your images by destination (1920x1080 for video, 1000x1000 for social media, etc.), then process each group in one batch operation. Professional bulk resizers can handle hundreds of files simultaneously, dramatically reducing processing time compared to handling images one by one.
Making Image Resizing Simple and Efficient
Image resizing is no longer a technical challenge—modern tools have democratized the process. Whether you need to make image 1920x1080 for a presentation, create a 1000x1000 picture for social media, or resize image 3000x3000 for professional printing, the right tools make it straightforward.
The key is matching your tool to your workflow. For occasional single-image work, simple online converters like a 500x500 converter suffice. For regular batch operations, dedicated bulk resizers deliver better efficiency. Professional designers might leverage full editing suites that combine resizing with other creative capabilities.
Understanding common dimensions—1920x1080 for video, 1000x1000 for social media, 3000x3000 for print, and 512x512 for icons—helps you make better decisions about your visual content. Combined with proper resizing techniques and quality tools, you can ensure your images always look their best, regardless of where they appear.
Related posts
Citation Checker Tools Compared: Free & Paid Options
Two completely different people search for citation checker tools, and almost every article online serves only one of them. The first is a student, researcher or academic. They have a reference list, and they need to know whether every source in it is real, correctly formatted, not retracted, and not quietly invented by an AI assistant that sounded very confident.

Plagiarism Checker Tools Compared: Free & Paid Options
A student hits submit at 3am, then spends the next four days refreshing her email because a checker gave her 24% and she does not know whether that number means she is fine or finished. That anxiety is the reason this category exists, and it is also the reason most articles about it are unhelpful. They list ten tools, rank them by nothing in particular, and never explain the one thing every reader actually wants to know: what does the percentage mean, and when should I be worried?

Indexing Checker Tools Compared: Free and Paid Options
You published the page eleven days ago. It is not in search results. You have checked forty times. So you type site: followed by your domain into the search box, count what comes back, and use that number to decide whether you have a problem. That number is not what you think it is. The site: operator is a filter, not a diagnostic. The count it returns is a rough estimate, it fluctuates wildly between refreshes on the same day, and it has never been intended as a measure of what is actually in the index. Building a technical decision on it is like weighing yourself on a scale that reports a different number every time you step on
Top 9 SEO Reporting Tools: Features & Pricing 2026
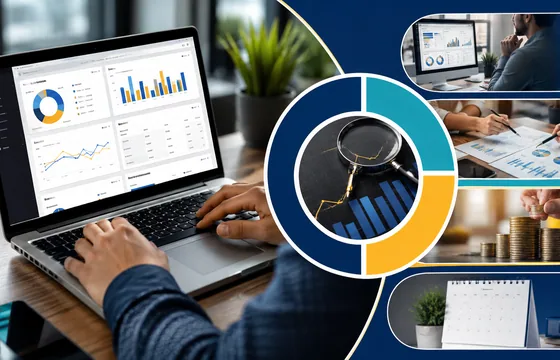
It is 8:47 a.m. on the first Monday of the month. Six client reports are due by noon. Your rankings live in one tool, your traffic lives in another, your backlinks live in a third, and your conversions are stuck inside a spreadsheet somebody renamed “FINAL_v4_real.xlsx” back in March. That gap is exactly what SEO reporting tools were built to close.
Android SDK Platform-Tools: The Complete 2026 Guide to ADB and Fastboot
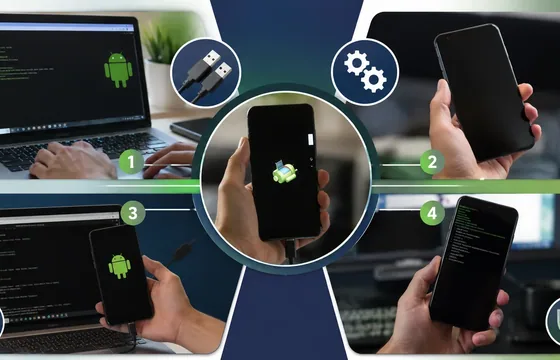
Android SDK Platform-Tools packs a lot of capability into a 10 MB download. Whether you are sideloading an app, chasing a bug, or flashing a fresh build, adb and fastboot are the tools that get it done, with no bloated IDE required. Set it up once, add it to your PATH, and it is ready whenever you need it. For more step-by-step guides and free utilities, browse the Toolsimpli Blog or explore the tools over at Toolsimpli.